I’ll be honest — most people don’t think about their SSD until something goes wrong. A file disappears. The laptop starts freezing mid-sentence. The computer takes forty-five seconds to boot when it used to take eight. By that point, you’re already in damage-control mode, scrambling to remember when you last backed anything up.
Here’s the uncomfortable truth about solid-state drives: they don’t fail loudly. The old spinning hard drives would warn you. They clicked. They slowed down. They made a grinding noise that made your stomach drop. SSDs just… stop. Sometimes there’s a gradual slowdown. Often there’s nothing. One boot it works, the next it doesn’t mount at all.
That’s why checking SSD health proactively — not reactively — is worth doing. It takes about three minutes. The tools are free. And this guide covers everything you need for both Windows 11 and Mac, whether you’re comfortable in a terminal or you’ve never opened one in your life.
First, What Does SSD Health Actually Measure?
This part matters because the numbers tools give you are meaningless if you don’t know what they’re tracking.
Solid-state drives store data on flash memory cells. Each write cycle — every time data gets written to those cells — degrades them a little. Manufacturers quantify this with a TBW number, short for Total Bytes Written. It’s basically the total amount of data your drive can absorb over its entire lifetime before the manufacturer considers it worn out. A mid-range 1TB consumer SSD might be rated for 300–600 TBW. Prosumer NVMe drives can hit 1,200 TBW or more.
SSD health monitoring tools pull data from something baked into almost every drive sold in the last fifteen years: S.M.A.R.T., which stands for Self-Monitoring, Analysis, and Reporting Technology. The drive tracks its own condition internally, and these tools read that data and translate it into something a human can understand.
The specific things worth paying attention to:
Health percentage — A 0 to 100% figure. Brand new drives sit at 100. Once the drive burns through its rated TBW, this hits 0. Drives usually keep working past 0%, but treating 0% as “fine, keep going” is not a bet worth making on a drive that holds years of your work.
Power-on hours — The total running time since manufacture. This is useful context when buying used laptops. A seller who says a laptop was “barely used” while the SSD logs 18,000 hours is not being fully straight with you.
Reallocated sectors — Flash cells that went bad and got quietly swapped out for reserve cells the manufacturer stashed on the drive. Some reallocated sectors are completely normal. The number you’re watching for is one that keeps going up, not one that’s been sitting static at 2 for three years.
Uncorrectable errors — This one should be zero. Always. Any number above zero means the drive encountered data it couldn’t read and couldn’t fix. That’s not a yellow flag. That’s a back-up-right-now flag.
Temperature — SSDs are rated to operate up to around 70°C. Running hot over long periods accelerates wear in a meaningful way. A laptop with poor airflow that keeps its SSD at 78°C isn’t going to last as long as the same drive in a well-ventilated machine.
How Do You Know If Your SSD Is Already Failing?
Sometimes the drive tells you clearly. More often it doesn’t. These are the signs worth taking seriously — especially if more than one is happening at the same time.
Saved files that come back garbled or empty. You write a document, save it, close it, reopen it, and what you get back looks like ASCII art or is just blank. That’s not a software bug. Healthy storage doesn’t corrupt files on save.
Load times that have gotten noticeably slower. Not slower like “Windows updated overnight and there’s extra startup stuff now.” Slower like launching Chrome now takes twelve seconds when it used to take two. Degraded flash cells read more slowly, and this shows up as sluggish application launches and long file transfers.
Stuttering or random short freezes. You’re typing, the cursor stops for two seconds, then continues. Or you’re browsing and the whole machine locks up for a moment then comes back. This often happens when the drive keeps retrying a bad sector read before eventually giving up or serving damaged data.
Blue screens (Windows) or kernel panics (Mac) with I/O or disk errors. Not every crash is storage-related, but disk I/O errors showing up in crash logs repeatedly? That’s pointing at the drive.
The drive capacity showing wrong. A 512GB SSD reporting as 80GB in Disk Management or Disk Utility — with no partition explanation — is showing signs of a failure that’s already well underway.
Boot failures or recovery mode prompts. If your machine is increasingly booting into recovery, asking you to repair the disk, or failing halfway through startup — the boot drive is struggling.
Experiencing two or more of the above simultaneously? Stop reading this article and go run a health check right now. Then come back.
How to Check SSD Health on Windows 11
The Built-In Check: Task Manager
This takes thirty seconds and requires nothing to install.
Hit Ctrl + Shift + Esc to open Task Manager. Go to the Performance tab on the left. Click on your disk — it’ll show as Disk 0, Disk 1, and so on. Down at the bottom of the panel, there’s a Disk health line. It’ll say Healthy, Caution, or Unhealthy.
If it says Healthy, you’re fine for a quick check. If it says anything else, treat that as a reason to run a more detailed tool immediately.
Worth knowing: this is basically pass/fail. You won’t see wear percentage, temperature, or any S.M.A.R.T. attributes here. Think of it as a smoke alarm. It tells you something’s wrong, not what or how bad.
The Proper Tool: CrystalDiskInfo (Free, No Nonsense)
If there’s one tool Windows users should have on their machine, it’s CrystalDiskInfo. It’s been around for years, it’s genuinely free (no bundled garbage if you download the Standard Edition), it’s lightweight, and it reads both older SATA SSDs and modern NVMe drives.
Grab it from crystalmark.info — don’t just search it and click the first result, since there are sites that wrap it with adware. Go to the official site.
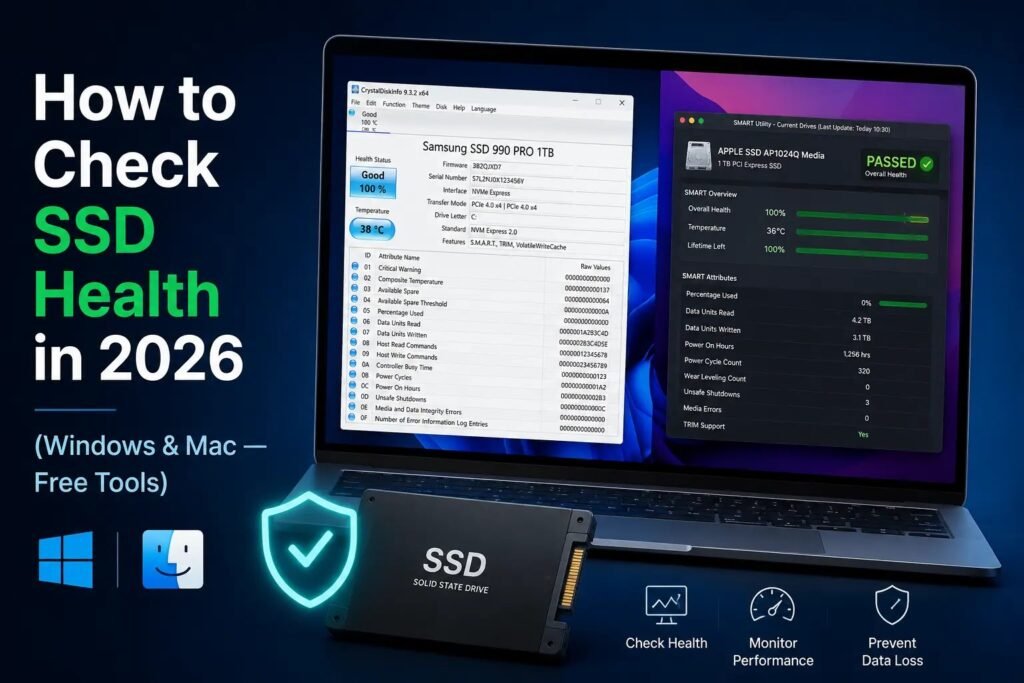
Once you install and run it, the interface shows you the overall health status in big text at the top left: Good, Caution, or Bad. Beneath that is the full list of S.M.A.R.T. attributes.
Here’s what to actually look at instead of staring at the wall of hex values:
The health status at the top is your headline number. Good means carry on. Caution means pay closer attention and back up more frequently. Bad means start backing up today and order a replacement.
Power On Hours is listed in the attributes. 5,000 hours on a three-year-old laptop is about right. 25,000 on a machine you were told is two years old raises questions.
Look for any attribute with a red or yellow indicator. CrystalDiskInfo color-codes anything that’s outside normal range. If everything is blue, you’re fine. If something is yellow or red, click on it and read the value.
Reallocated Sectors Count — attribute ID 05. Should be zero, or a small static number. If it’s non-zero and you come back in a month and it’s higher, that’s a drive actively degrading.
Temperature shows at the very top of the window. Under 45°C is good. 50–60°C is acceptable. Above 65°C consistently means something is wrong with airflow or the drive is being stressed.
The No-Install Option: PowerShell
Don’t want to install anything? Fair enough.
Right-click the Start button and open Windows Terminal (Admin) or PowerShell (Admin). Paste this in and press Enter:
Get-PhysicalDisk | Select-Object FriendlyName, MediaType, OperationalStatus, HealthStatusYou’ll get a quick table showing each drive, its type, and whether Windows considers it healthy or degraded. It doesn’t give you S.M.A.R.T. details, but it takes ten seconds and works on any Windows 11 machine without downloading anything.
How to Check SSD Health on Mac
The Built-In Check: Disk Utility
Open Spotlight with Cmd + Space, search for Disk Utility, and open it. Click on your main internal drive in the left panel. At the bottom of the window, find S.M.A.R.T. Status.
It will say either Verified or Failing.
Failing means you are in an emergency situation. Seriously — plug in an external drive, back up everything you can, and do not turn the computer off until you’ve gotten your most important files somewhere safe. Drives that reach “Failing” in Disk Utility can become completely unresponsive very quickly.
Verified means Apple’s built-in check sees nothing obviously wrong, but — and this matters — Disk Utility is extremely conservative with what it reports. It’s not looking at wear percentage, temperature trends, or rising error counts. It’s essentially checking whether the drive’s worst attributes have crossed a threshold. A drive at 15% health remaining could still say Verified.
For anything beyond a quick pass/fail, you need a third-party tool.
The Best Third-Party Option: DriveDx
DriveDx is the Mac equivalent of CrystalDiskInfo. It reads the full S.M.A.R.T. attribute list, shows a health percentage, tracks temperature, and supports Apple Silicon Macs, Intel Macs, NVMe drives, and external USB SSDs.
The full version is around $20. But here’s the practical bit: the free trial reads your current drive health in full — it just doesn’t give you ongoing monitoring without purchasing. If you’re checking a specific drive you’re worried about, the trial does everything you need.
The Thorough Option: smartmontools (Terminal)
If you’re comfortable with Terminal, smartmontools gives you the rawest, most complete S.M.A.R.T. data available on Mac. Install it through Homebrew:
bash
brew install smartmontoolsThen run:
bash
smartctl -a /dev/disk0If you’re not sure which disk is which, run diskutil list first and match up the identifiers.
The output is dense but the first few lines tell you the overall verdict, and scrolling through it you’ll find power-on hours, reallocated sector counts, temperature, and every other S.M.A.R.T. attribute the drive exposes. It’s more information than most people need but absolutely nothing is hidden.
Making Sense of the Numbers
You’ve run a tool and now you’re looking at a health percentage or a list of attributes. Here’s a plain-language key.
80–100%: Drive is in good health. Carry on, keep your backups current.
50–79%: Past the midpoint of its rated life but still operating normally. Start backing up more regularly — weekly rather than whenever you remember.
20–49%: Approaching the end of its rated lifespan. Not failing, but getting there. Plan for a replacement within the next year or so and make backups a strict habit.
Under 20%: Treat this like it’s already failed. It may work fine for another year. It may not last the month. Don’t gamble with data you care about.
Reallocated sectors that keep increasing month over month: This matters regardless of what the health percentage says. A drive at 85% health that’s been reallocating sectors every week has an underlying physical issue. Watch it closely. Back up weekly.
Any uncorrectable errors at all: This is the most serious single indicator. Back up immediately. Replace the drive on your next shopping day.
Temperature spiking above 70°C regularly: Check the laptop’s vents — even blowing them out with compressed air can help. The drive itself isn’t failing, but sustained heat makes it fail faster.
How Often Is Often Enough?
Every three months is a reasonable cadence for most people. Set a calendar reminder — literally just a five-minute recurring task. It takes longer to open the application than to read the result.
If you’re someone who writes to the drive heavily — video editors, game developers, people running databases — check monthly. Those use cases burn through TBW faster than regular office use.
On Backups — the Part Everyone Skips
No health check result changes the value of a backup. A drive at 100% health can fail unexpectedly from a power surge, physical shock, a firmware bug, or just random bad luck. The health percentage is about wear, not about everything that can go wrong.
On Windows 11, File History handles automatic incremental backups to an external drive. Cloud storage through OneDrive, Google Drive, or Backblaze works well as a second copy. On Mac, Time Machine is built in and genuinely good — plug in an external drive, turn it on, leave it alone.
The rule is simple: if you’d be upset losing it, it should exist in at least two places.
SSD Health Tools at a Glance
| Tool | Platform | Cost | Best For |
|---|---|---|---|
| CrystalDiskInfo | Windows | Free | Full S.M.A.R.T. data, NVMe, best overall |
| Task Manager | Windows 11 | Built-in | Quick 30-second check |
| PowerShell | Windows 11 | Built-in | No-install status check |
| Disk Utility | macOS | Built-in | Quick pass/fail check |
| DriveDx | macOS | Free trial / $20 | Full health data and monitoring |
| smartmontools | macOS / Linux | Free | Terminal, raw S.M.A.R.T. output |
Wrapping Up
Checking your SSD health is one of those five-minute tasks that feels pointless every time you do it — right up until it isn’t. The drives that fail without warning are the ones nobody was watching.
Run a check today. Then come back in three months and do it again. Keep your backups running in the background. It’s not complicated, it’s just consistent — and consistent is all it takes to avoid the very bad afternoon where you realize everything is gone.